Hello friends!
It's Day #4 and the final day of the Stamping Sisters card camp :)
And today's camp counselor is Darlene <3

And WOW!
Did she ever save an AMAZING card tutorial/product for the end -
talk about a big last camp HURRAH!

My post is a picture heavy one which shows how I made my
card and the elements of how it works from bulky to flat!
Darlene explains is beautifully in her blog post here
and I will show you my card ....
then, if you want to see all the photos, keep scrollin!

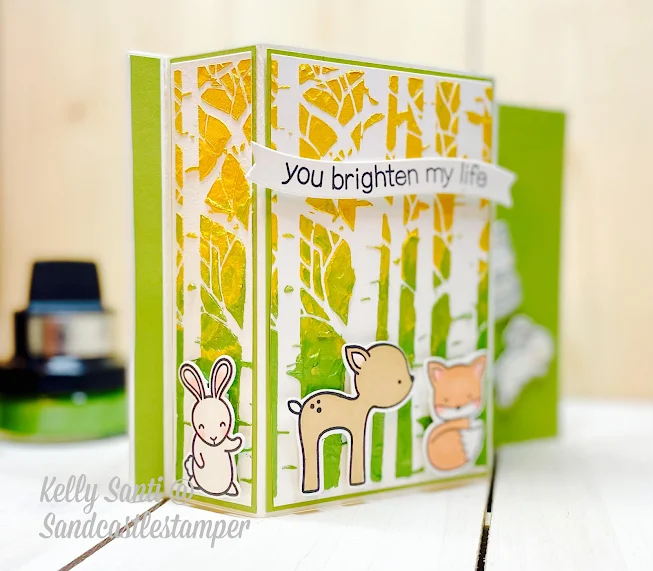
For my card based on her tutorial, I used the amazing gilding polish
that Darlene generously sent - THANK YOU, Darlene!
She sent me a gorgeous vibrant green and yellow
and I was so excited to try these!

This is the first time I've ever used them so it was a bit of a learning curve,
but a good one.
I used a woodland stencil from TCW and wasn't sure how to use the polish
and ended up layering it on SUPER thick!
I did use spatulas but in case ya didn't know - the lid is a brush! :)~

It gave me some awesome texture though!
I'm not mad at it!
And I decided to add yellow for the golden hour sun peeking through
the woodland trees and in the middle, blending the two colors.
They kept saying it dries quick but 2 hours later,
mine was still thinking about it, LOL!

Next up, I got to working on the card fold.
Per her directions, it's a 5 x 7 and is/like a bridge fold (I think?!)
but folds flat for mailing.
I had to wiggle mine just a wee bit as I realized my stencil was 4 x 4!
But I loved the result of the "woods" ....
the green with the burst of the golden sun peeking through the trees <3
Behold!

and knew I wanted to add woodland critters.
I am over the moon with how this turned out
(even with a scandelous amount of hours to make it! gasp!)
This was an amazing card adventure -
one I would not have gone on had it not been for Darlene's amazing gift
AND her amazing card challenge tutorial.

Here's what it looks like flattened for mailing ....
('member Flat Stanley? We'd squish him and mail him?!!)


~Kelly


