1.31.2022

I used my good paper ..........


Hi friends!

Today's post is a super simple CAS card 

with a theme of:  hearts!


I used a background panel that I'd watercolored

and it sat in my 'use me eventually!' pile.

I took my Hero Arts infinity hearts dies and cut a heart shape

and intentionally cut it off center a little bit to have part of it straight.

I did that for the drama :)

Underneath is a glimmery gold paper from Recollections

and someone please PLEASE tell me how to photograph shimmery paper!

It's the worst!

I tried and tried and finally just said 'yup, looks good!"


The sentiment had me in stitches when I saw it -

the limited edition Brutus Monroe and Taylored Expressions stamp set.

It's filled with sweet, funny, cute and fabulous sentiments!

And I do love me some cheeky Valentines!


That's it for this post ~

thanks for stopping by!

Be blessed,

~Kelly

1.29.2022

Mermaid TALES - Inspiration!


Hi friends!


Today, I have a tale to tell of a tail ...

of a mermaid!

I know ...... huh?


I can finally share this card that I've been sitting on!

Although if you follow me on Instagram or YouTube,

 you've already seen it :)

Today, I'm hosting the Inspiration Challenge at Splitcoaststampers

and the site that I've chosen is Natural Life.


It's super groovy site!  Very bohemian and boho chic and 

- as my family likes to say about me -

 super hippie :)

They also have a Pinterest board here for more inspiration!


How does the Inspiration Challenge work?

Browse their store or Pinterest, find a photo that inspires you,

and create a card/project based on some part of the photo.

Maybe it's exact or just a color scheme or element from the photo!

Here is what inspired me - this purple jacket and the blue rolling waves.

Easy Peasy!

This is my 2nd year hostessing and am looking forward to 2022!


Thanks for stopping by today!

Be blessed,

Kelly

1.27.2022

Stamping Sisters Camp - Day 4!


 Hello friends!

It's Day #4 and the final day of the Stamping Sisters card camp :)

And today's camp counselor is Darlene <3


And WOW!

Did she ever save an AMAZING card tutorial/product for the end - 

talk about a big last camp HURRAH!


My post is a picture heavy one which shows how I made my

card and the elements of how it works from bulky to flat!

Darlene explains is beautifully in her blog post here

and I will show you my card ....

then, if you want to see all the photos, keep scrollin!


For my card based on her tutorial, I used the amazing gilding polish

that Darlene generously sent - THANK YOU, Darlene! 

She sent me a gorgeous vibrant green and yellow

and I was so excited to try these!


This is the first time I've ever used them so it was a bit of a learning curve,

but a good one.

I used a woodland stencil from TCW and wasn't sure how to use the polish

and ended up layering it on SUPER thick!

I did use spatulas but in case ya didn't know - the lid is a brush! :)~


It gave me some awesome texture though!

I'm not mad at it!

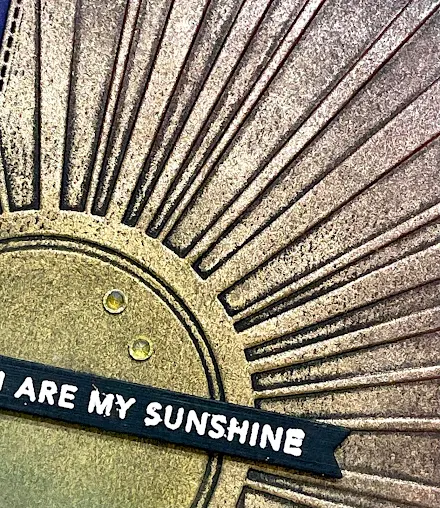
And I decided to add yellow for the golden hour sun peeking through

the woodland trees and in the middle, blending the two colors.

They kept saying it dries quick but 2 hours later, 

mine was still thinking about it, LOL!


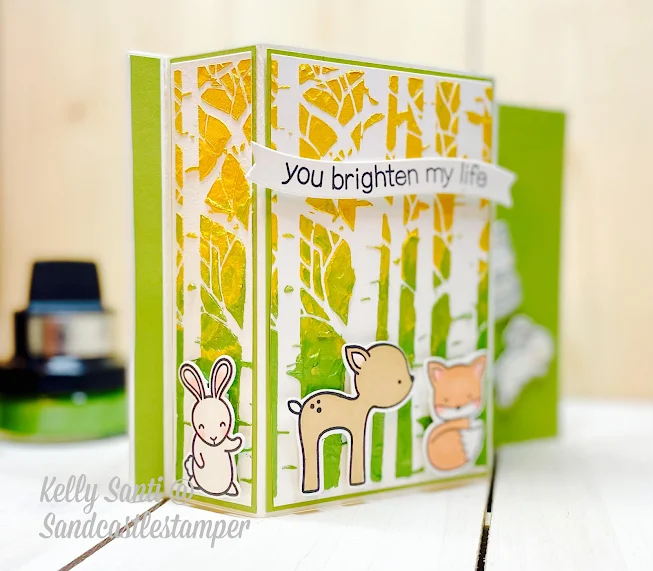
Next up, I got to working on the card fold.

Per her directions, it's a 5 x 7 and is/like a bridge fold (I think?!)

but folds flat for mailing.

I had to wiggle mine just a wee bit as I realized my stencil was 4 x 4!

But I loved the result of the "woods" ....

the green with the burst of the golden sun peeking through the trees <3

Behold!


                 I used a few different Lawn Fawn sets to complete the look

and knew I wanted to add woodland critters.

I am over the moon with how this turned out

(even with a scandelous amount of hours to make it! gasp!)

This was an amazing card adventure -

one I would not have gone on had it not been for Darlene's amazing gift

AND her amazing card challenge tutorial.


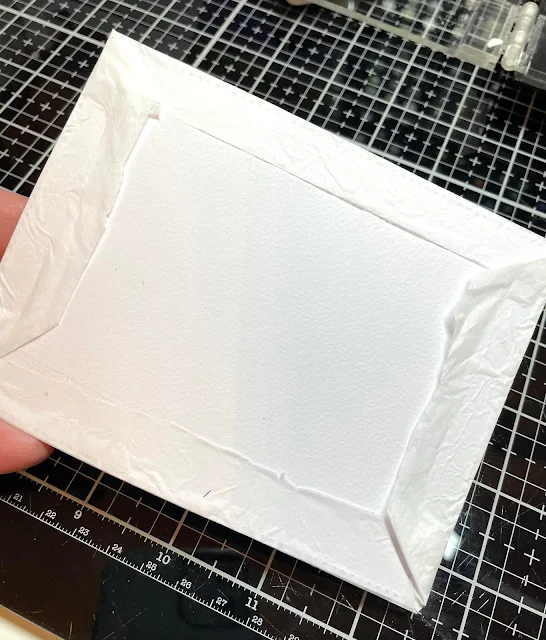
Here's what it looks like flattened for mailing ....

('member Flat Stanley?  We'd squish him and mail him?!!)


I think the last tip

 - or how I made this one -

is the left side (by the waving bunny) is glued down with score tape.


The other side remains open so the recipient can read the card

and it tucks into place underneath the critter by the jumping bunny.


This was such a fun week ~ bringing camp 'home' since we can't 

get together again at this time.

Maybe one day soon!

Here is the line up of our week that we've posted each day,

the counselor of the day and the class we all taught.

It was certainly massive fun and

I'm already thinking up ideas for summer camp!


Monday/January 24th  ~ Jeanette @ Creativeplay 
Tuesday/January 25th ~ Kelly @ Sandcastlestamper
Wednesday/January 26th ~ Barb  @ inkingintoretirement
Thursday/January 27th ~ Darlene @ Accordingtobijou

Thanks for stopping by!

Be blessed!

~Kelly

1.26.2022

Stamping Sisters Camp - Day 3!


Hi friends! 

It's Day 3  of the Stamping Sisters winter card camp

and our camp counselor today is:  Barb!


Her challenge for us today was to create a card using the 

faux tile backsplash technique and O.M.G!

This was fun!


If you'd like to go back and see all the camp cards,

here's the line up of cards and techniques!


Monday/January 24th  ~ Jeanette @ Creativeplay 
Tuesday/January 25th ~ Kelly @ Sandcastlestamper
Wednesday/January 26th ~ Barb  @ inkingintoretirement
Thursday/January 27th ~ Darlene @ Accordingtobijou


On to my card!

Here's my card and then keep scrollin' if you'd like to see 

the how/where/when/what and why :)


For my card here, I started with red and pink cardstock

cut with my new Ellen Hudson Color Me Strips die -

which I've had and has been forever in it's package!


Thanks for the nudge to use it, Barb!


From there, I did the technique following Barb's instructions

and wove both the pink and red strips of cardstock from MFT stamps.


But even with double adhesive AND taping the back, my weave moved.

Once it was woven into place, 

 I clear embossed the front weaved panel

to give it the 'shiny' look - just like a real tile backsplash!

Brilliant!


Since my woven panel moved while my eyeballs were elsewhere,

 I thunk and thunk some more.

I said to myself ...

 "Self!  Cover it up!"

"No. one. is. gonna. know."

 :) 

 So, I popped up the panel on the front

with a heart from Hero Arts nesting hearts dies.

The stamp set I used is MFT Stamps Grande Sized Love

and I colored her with my new gifted from Santa copic markers!


 Here's a final look:


And that's it for Day 3 of camp!

I hope Barb and the other campers like my card ~

if not, I brought some  s'mores!

Surely chocolate and a campfire will make up for it ...

and I'm sure I have a few skits and jokes I can tell!


Thanks for stopping by!

Be blessed!

~Kelly


1.25.2022

Stamping Sisters Camp - Day 2!


Hi there, friends!


Welcome to day #2 of the Stamping Sisters winter camp.

That means all 4 of us

(Barb, Darlene, Jeanette and myself)

will bring you a different class / card technique each day this week.


Today, I'm the camp counselor

and I call this cardmaking idea 

"Let's get RIPPED!" :)


This is a photo heavy post but if you'd like to see the video version,

feel free to click on my YouTube channel video here


The first thing you'll need is some cardstock - 

both an a2 size base and a quarter panel for the base layer

and 2 sheets of WHITE tissue paper.


You'll need solid stamps and a couple colors of inks.  

Cubes are great since you'll be working in small spaces, nooks n crannies!


Once the images are all stamped out, let them dry for a minute or two.

While that's drying, start your base layer of the card

by taking the second tissue paper and wrapping your card base layer.

Any adhesive or tape will do as you'll cover this part up.


Set that aside and go back to your stamped solid images.

Start ripping /tearing around the image carefully so that you have

just the images along with a slight edge.


This part can be anything you want it to be - torn/ripped/missing a piece ...

it is perfectly imperfect and your OWN creation!


They should look something like this.

The idea is to create a layer.  This works best if you have multiples!

I always lay them out first to get an idea of where they will go ...

before gluing :)

You can use pixie spray or spray adhesive to add them to your card base.


Glue it down and add a sentiment/embellishment if you like!

I used the sentiment strips from Taylored Expressions

and added enamel dots and let the ripped paper be the focal point.


Here she is!


I don't have photos of the blue floral card

but it is in the video content on my YouTube channel.

That one is equally beautiful!

Such a fun technique and I hope you give it a try.

Here are the camp counselors and their class dates:

Monday/January 24th  ~ Jeanette @ Creativeplay 
Tuesday/January 25th ~ Kelly @ Sandcastlestamper
Wednesday/January 26th ~ Barb  @ inkingintoretirement
Thursday/January 27th ~ Darlene @ Accordingtobijou


I hope this made sense!

It's a fun way to create extra dimension and 'drama' to your cardmaking

and takes the tissue paper stamping a big leap further!

Each time you create this, it will always be unique and one of a kind.


Thanks for stopping in today!

Be blessed,

~Kelly


1.24.2022

Stamping Sisters Camp - Day 1!


Hello sweet friends!

Welcome to my blog and Day #1 of winter camp!
For the next 4 days, we 4 friends (Barb, Darlene, Jeanette and myself)
will be bringing you a 'class a day' with a fun, interesting,
and definitely unique technique!


We are sharing it to inspire YOU as well!
Maybe it's something you are familiar with
or will be seeing for the first time ~ like me!

This is our camp class line up:

Monday/January 24th  ~ Jeanette @ Creativeplay 
Tuesday/January 25th ~ Kelly @ Sandcastlestamper
Wednesday/January 26th ~ Barb  @ inkingintoretirement
Thursday/January 27th ~ Darlene @ Accordingtobijou


Jeanette gave us these directions:  The idea to feature embossing folders came to me as I was organizing (and purging) my huge collection of embossing folders. I realized I rarely ever use them. It is time they see some action so I knew for my challenge, three things had to be present...

1. The embossing folder/s MUST be the star of the card.

2. No stamped images are allowed on the card.

3. Sentiments are optional.


Today's class is taught by Jeanette and 
I was today years old when I learned AND tried luster rub on! :)

My set of luster rub on paints were definitely full of shimmer and sparkle
and I ended up buying a set that was a little brighter and colorful.
Because of that, I dug through my embossing folders
fully intending at first to do a floral 
(since the yellow/red/greens lended to that)
BUT it was absolutely hideous.
I had a house full of people, cooking, talking, laughing
and just absolutely could not think of another way to make it work.
So I tossed it, went back to the drawing board
(as they still ate, talked, laughed!) and thought 
Outdoors!
Grass, sun, sunburst!


And a ta-da moment was born ........
I used a Taylored Expressions starburst embossing folder
and white embossed a sentiment to match.
At first I used my blending brushes (da junky ones!
the luster is absolutely messy!)
but then just switched to my hands and did RUB it ON, as the name says!

And I. was. out. of. black. cardstock!

SO!
I used dark purple :)

This card is just okay - not my favorite but not my worst ;)
Definitely a learning curve!

As you can see from my pots, this stuff goes all over!
I need to wipe it down but it was get this up and blogged, first!


And that's it for Camp day #1!
I hope I get at least a C+ :)

This was fun!
Try it out!

And come back tomorrow - I'm the teacher.
Er'body gets an A!

Hugs!
~Kelly

1.23.2022

Be Kind!


Hello sweet friends!


Today's card is quite a wonder - 

created with some messy watercoloring

with a sprinkle of kindness!


I created this card this morning for a blog hop on Instagram

and you can read all the details here

or see it on my YouTube channel here!


So it's a perfect addition to the #satmornmakes as well

in which youtube content creators

 share our makes from Saturday (morning) :)


And ...

ya still with me?!

The Inspiration Challenge at Splitcoaststampers this week

has a wonderful site.  

It's one of the few challenges I manage to squeeze in

(since Friday night is basically my ONLY craft time now!)

and I saw this beautiful sunflower calendar.

When looking for a stamp to create a card with today,

I found my Stamptember Simon Says Stamp /Honey Bee Stamps

"Be a sunflower" stamp and die set and said 'that's it!'


Thanks so much for stopping by today!

Be blessed!

~Kelly