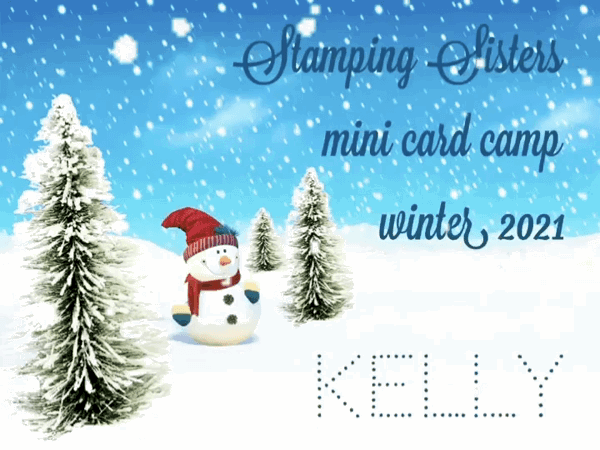
1.30.2021

It's a shindigz!


Hi friends!


Happy weekend ~ I'm so glad it's here!

I plan do rest, catch up on reading for my book club,

and try out some some new recipes!


Today I have the wonderful opportunity to be a guest designer

at the Splitcoaststampers challenge forum.

I chose the site Shindigz party supply store

for it's colorful and fun party planning items.


Here is my card:


The inspiration for my card was this artic playground.

I used Avery Elle's Bring on the Joy

and colored them with prismacolor markers.

The background is made with pigment powders.


I'm one card closer to have one ready for Christmas 2021!

That's about it for today's card!

Thanks for stopping by!


1.28.2021

Winter card camp ~ Sticky fingers!


Hi friends!


*This is a picture heavy post! I took a lot of pictures because I had a lot of 

mishaps and what not to do ~ scoll down to see just the card

or ALL THE WAY THROUGH to see the whole process!*


It's the last day of winter card camp with our final class

and today's class from Jeanette is all about using glue!

It was a huge learning curve and took me awhile

but I decided to stick with it :)


Today's theme: Using school glue as a base coat for the card

and then blend a distress ink on top of that!


To skip the blog post, here is my card:


I'm a visual learner and tried my best to follow the tutorial 

but did have some struggles along the way.

 In case you are reading this and want to give this a go,

I'll share with you 2 problems that I ran into so you won't have them!


The technique requires an acrylic block, acetate or layering tool.

I didn't have an acrylic block and even used an old wooden stamp block

and didn't want it to smoosh around with acetate.

So I improvised and used this .........

a sponge brush.

You may remember that from this creative adventure! 


Next, I started swiping into the regular school glue and I ran 

into problem #2 ~ it's too thick.

I tried another glue (name brand, fancy schmancy) - same result.

I decided to just dilute it and added a teaspoon of warm water and

per-fec-tion!


The first couple 'passed' with the brush sponge were JUICY!

I mean, it was on there like stripes on candy cane!


For the next one, I squeezed a lot of it out before adding it to the base

and it gave it was beautiful lightwash texture -

a lot like what you'd see when you paint a wall.


I made 5 base panels and this reminds me SO MUCH of gesso.

I let them dry - they took over 3 hours total because there was 

one or two tiny spots that were persistent :)

Finally, I used the mini stamping tool to blend and just chose

random distress oxides because I had NO IDEA what I was going to 

make with the completed panels.

I thought "Choose blue!  You can't go wrong with something blue!"


Here are 3 and you can really see how the glue gives it

a great balance between the smooth parts and texture.

Because I'm not really in a creative spirit right now,

I took the easy way out and just went with flowers.


After stamping and die cutting the flowers,

I decided to use light blue as a background and teal blue for leaves.

And after glueing it all down, I added a sentiment and done!


And that's my card and the wrap up of our friends

winter camp with 4 different tutorials!

The hilarious part - as I was cleaning up and getting rid of the glue,

I maybe have accidentally invented another technique!


Stick around - it may be coming up soon in a blog post :)

Thanks for stopping by today!


CCEE2104 ~ Warm and Cozy!


Hi friends!

Welcome to another CCEE Stampers challenge for this week.

I feel like I blinked and it's already Thursday!

Lynn has our final CCEE Challenge for January and she says:

Many of us are experiencing very cold days during late January in our part of the world. Feature on your design something that makes you feel warm and cozy even on the coldest of winter days!


Here in Miami, Florida we have 4 seasons ~

summer, summer, summer and last but not least, summer!


This is a wonderful theme, Lynn!

My card is very simple - being outdoors!

Since we are blessed with year round wonderful weather,

we spend as much as we can outside!


We have a Mr. Linky at the CCEE Stampers blog 

that you can play along and share your creations, too.

Should you post to an online gallery other than your own blog,

please add keyword CCEE2104.


Thanks for stopping by!


1.27.2021

Winter card camp ~ Stamped Paper!


Hi friends!

Welcome to Day 3 of winter card camp where today

I am the teacher!


Oh boy.

I think in real life I'd be one who brings cupcakes to school at 7 am,

has disco music on during class

 and would put my feet up on the desk!

So ... it's probably a good thing that's not the profession I chose ;)


For today, my class is easy peasy!

Like so ridiculously easy!

Sneak Peeks:


Supplies need:

 Any magazine, ink and a stamp w/ a matching die if desired

(you can always just fussy cut!)


The idea behind these cards started during the holidays.

We were getting catalog after catalog in our mailbox,

and most were unsolicisted and went into the trash.

A few I kept and thought - these are too nice to get rid of!

At the very least, use them for ......... something. anything.


Pick your magazine page and ink up a stamp.

Stamp directly onto your magazine paper and let it dry.

The paper tends to be a little slick - so a heat gun may be good, too

but not necessary.

Once it's dry, die cut/fussy cut your image and add it to your card.

Super simple!


I lining up the dies to see where I'll get the words I like

since this one will be a full word stamped images.

Here's my first card using Concord and 9 Festive Friends.

I chose this one and this paper because it was from the Boy's Life

Boy Scout magazine my son gets.

He likes the jokes, I like the hero stories that are in it

but for this card, I chose one intentionally with words on it.

Their troop sells Christmas trees each year at a lot to fundraise,

so I thought this girl holding package would be a good choice.

Even the background was another page from the magazine!


Next up, this card is using floral images from a magazine,

cut to smaller pieces for easier stamping.

I'm using Magnolia from Neat and Tangled

and stamped on the magazine and die cut the images.


I die cut the frame and then cut an identical one on white cardstock.

They are glued together using only the top of the magazine paper,

the bottom is white cardstock.


Next, I used varied scraps of the floral bouquets for my images

and I stamped directly onto the paper.


Using the matching dies, I cut those out and started my card

assembly, adding them to the front and adding a sentiment.

I love the unique look the paper gives it!


          I chose this sentiment because beauty is truly everywhere,

including in junk mail :)

Thanks for getting this far!


Thank you for stopping by!


1.26.2021

Winter card camp ~ Watercolor reflection!


Hi friends!

My card today is a watercolor card gone very wrong yet right!


I'll explain!

Today is Day #2 of the Stamping Sisters winter mini card camp

and our teacher for today's tutorial is Darlene!

Our 'camp class schedule' is:

Monday, January 25 ~  Barb @ inkingintoretirement
Tuesday, January 26 ~ Darlene (me!) @ Accordingtobijou
Wednesday, January 27 ~ Kelly @ Sandcastlestamper
Thursday January 28 ~ Jeanette @ Creativeplay


She has a beautiful watercolor technique using the popular

Lovely As A Tree by Stampin' Up

and asked us to use that stamp set plus any watercolors.


I'll show you my completed card first 

and then let you know what I discoverd that was good ....

and perhaps not so good! :)


I started with using a heavyweight #140 watercolor paper

and my Altenew half pans watercolors.


                                                   Oh!

     I also temporarily unmounted the tree stamp I was working with

to get a better fit in my MISTI.


I watercolored a background and then stamped and woah ....

it was an absolute train wreck!

I had a beautiful watercolor background but as soon as I stamped,

they were wonky and didn't line up.

So that did not work for me :/


  I switched gears and stamped first, watercolored second.

Tada!


I stamped the top forest 7 times (my lucky number!) and

I knew I was going to have the bottom half as a reflection

so I purposely stamped it off on a scrap paper

and then stamped it down for the lightest image.

Even though I heat set the image,

once I started watercoloring, the black ink started to react

to the watercolors and started to smear *gasp!*

So the neon greenish-yellowish color?

I didn't paint that!

It was a direct reaction to the ink and the navy blue watercolors

but I absolutely loved the effect ~

it reminded me kinda sorta of the Aurora Borealis.


And that's my card for today!

Thank you, Darlene, for your beautiful tutorial!

I'll be back tomorrow with my class ~ stay tuned!


Thanks so much for stopping by today!


1.25.2021

Stamping Sisters Mini Card Camp ~ Mini Strips!


Hi friends!

Today's post is Day 1 of 4 days of mini winter card camp ~

a spin off of our summer card camp!

Since we couldn't be together last year for real camp,

it became a virtual camp where each of us hostessed a challenge.


Flash forward to 2021,

and it's winter EVERYWHERE but here in Miami,

so I get to dream of snow and pretend I'm wearing Bernie's mittens :)


Today's forecast:  

Barb gave us a card challenge to complete today

and it's one that was fun but detailed and I was squinting through half 

of it - so if my lines are crooked, just lean sideways!


Her class assignment and tutorial:

Use strips of paper or cardstock to create your card

and add a large word die for a focal sentiment.

I chose this gorgeous sunflower dsp I had in my stash,

PTI avacado cardstock (old as da hills!)

 and a hello die from MFT Stamps.


This paper seemed like a good choice at the time but 

- as mama always said when she saw a flashy outfit - 

turned out to be a bit too 'loud' :)


Onward!

Here's what I started with .........

cutting the papers and cardstock to different lengths.


If I had one tip,

as I cut a bunch of strips, I realized I cut WAY too many.

As you are cutting the edges off from the edges,

there's plenty of small-ish strips that will be perfect for the smaller ends!


Overall, this was a FUN technique and I hope I get a passing grade ~

or at least an A for effort and enthusiasm!

*grin!*

Here is the line up for the next 4 days ~

and peep me on Wednesday to see what crazy idea I have mine!

Monday, January 25 ~  Barb (me!)  @ inkingintoretirement
Tuesday, January 26 ~ Darlene @ Accordingtobijou
Wednesday, January 27 ~ Kelly @ Sandcastlestamper
Thursday January 28 ~ Jeanette @ Creativeplay

Thanks for stopping by!


1.24.2021

Sweet Cluster + video!


Hi friends!


Today's card is very sweet!

It's the Sweet Cluster stamp, a gift from Altenew!

I was so happy to open the mail this weekend

and see this stamp with a wonderful notecard inside

saying thank you for supporting us through 2020 :)


Kindness is my kind of people!


I created a card right away and

I have a new video up on my YouTube channel

I'd love for you to take a peek!

I'm the new kid on the block and it's a little bit of a learning curve!

But I have some fun ideas, creative idea, CRAZY ideas 

and they are all coming up!


For this card, I *saw it* in my head and just created this card

on. the. fly!

As in I winged it :)

I used the half tone stencil and some soft grey ink

and blended a quick background, 

popped the colored flowers onto the front and added a hello!


Thanks so much for stopping by!


New YouTube video - floral focal points!


Hello friends!


Today I have some floral cards to share with you

that were so much fun to make

and I've added this to my YouTube channel.


These took a good part of the afternoon

with a lot of building (and even more tape!)

but oh. so. worth. it!


it got up before my blog post did but that's okay! 

 Today is the start of a new week .. I'm starting fresh :)


Kinda like flowers ..... fresh is better!


and a sentiment from Wispy Begonia.

You can hear about all the background watercolor panels

and 'the new me' if you head on over to listen! 

I'm still new to video making but this one has a lot of music 

and less of me talking! :)


One more look:


As always, thanks for stopping by!