Hi friends!
*This is a picture heavy post! I took a lot of pictures because I had a lot of
mishaps and what not to do ~ scoll down to see just the card
or ALL THE WAY THROUGH to see the whole process!*
It's the last day of winter card camp with our final class
and today's class from Jeanette is all about using glue!
It was a huge learning curve and took me awhile
but I decided to stick with it :)
Today's theme: Using school glue as a base coat for the card
and then blend a distress ink on top of that!
I'm a visual learner and tried my best to follow the tutorial
but did have some struggles along the way.
In case you are reading this and want to give this a go,
I'll share with you 2 problems that I ran into so you won't have them!
The technique requires an acrylic block, acetate or layering tool.
I didn't have an acrylic block and even used an old wooden stamp block
and didn't want it to smoosh around with acetate.
So I improvised and used this .........
a sponge brush.
You may remember that from this creative adventure!
Next, I started swiping into the regular school glue and I ran
into problem #2 ~ it's too thick.
I tried another glue (name brand, fancy schmancy) - same result.
I decided to just dilute it and added a teaspoon of warm water and
per-fec-tion!
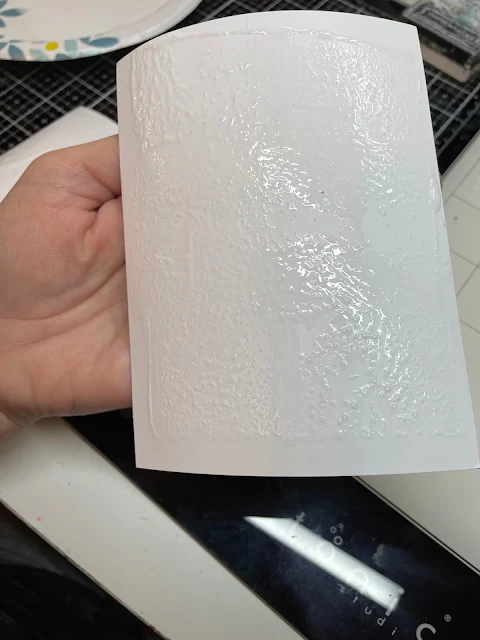
The first couple 'passed' with the brush sponge were JUICY!
I mean, it was on there like stripes on candy cane!
For the next one, I squeezed a lot of it out before adding it to the base
and it gave it was beautiful lightwash texture -
a lot like what you'd see when you paint a wall.


it's gorgeous Kelly
ReplyDeleteGr Karin
Your cards are stunning! I will need to try again and add more glue to my base. Your colors are awesome and of course you used flowers! Beautiful Card!
ReplyDeleteOh my goodness, Kelly - your card is jaw-dropping gorgeous! And your step-by-step of the process is fabulous, too! Thanks for embracing this idea so beautifully!
ReplyDeleteWell, it certainly turned out beautiful!! What gorgeous blossoms, Kelly!! And an awesome card!
ReplyDeleteFabulous florals! Thanks for the step by step - more sticky inspiration!
ReplyDeleteBeautiful colors! Glad you stuck with it. TFS!
ReplyDeleteAnother fab technique, Kelly!! Great you changed it and have something new!! LOVE the result, your card looks just amazing! Fab colours, textures and flowers!!!
ReplyDeleteBeautiful floral card Kelly and the colours are amazing, beautifully designed, Kate x
ReplyDeleteA great read and love the end result Kelly. The flowers are beautiful and a gorgeous design. Have a lovely weekend. Big hugs and blessings, Carol S.xxxx
ReplyDeleteSuch an interesting technique. The colors are beautiful. I love the flowers.
ReplyDeleteWhat a great series of tutorials you four ladies have provided, and I love your take on this one - and the results!! Fabulous work Kelly - looking forward to the new technique :)
ReplyDeleteStay safe
Blessings
Maxine
Beautiful card. Great description of the technique and it looks like an interesting technique as well. I think I'd like to try it. Great job on this.
ReplyDelete