2.23.2022

Guest Designer - Tutorial: Wall Tile Background!


Hi everyone!


Today I have the privilege of being a Tutorial Guest Designer

at Splitcoaststampers with a technique that I call

Wall Tile Background!


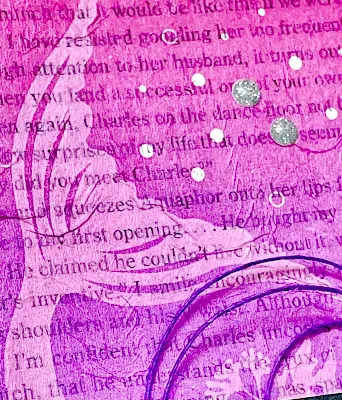
I literally stumbled upon this idea by accident playing around

with my removeable wall tile decor.

I looked at all the hills and valleys and thought hmmmm...

that looks like a fun faux embossing folder!

The tile lended itself to be a beautiful background once 

mixed with paper, water and ink!


You can see the video here on YouTube at the 

Splitcoaststampers channel!

https://youtu.be/l5aPejTatZs


Here is the finished  look if you want to skip ahead 

to the final card :)


I started with these supplies:


This was actually quite easy and not quite as messy as it may seem,

although you know I love my messy art :)


Why this technique?


1. It was fun!  WAY fun!

2. It's cost effective - it was one whole dollar :)  Yep ... $1!

3. It's an alternative to an embossing folder ... 

4. did I mention fun?

5. You never get the same look twice!

Each and every background, every time, will be unique!


Head on over to Splitcoaststampers 

Tutorial section for more step by step instructions,

photos and the video!


Thanks for stopping by!
~Kelly


2.17.2022

CCEE2206 ~ National Embroidery Month


Hi friends!


Time for another CCEE Stampers challenge 

and this week we are celebrating National Embroidery Month!

Liz, our February hostess, invites us to create a project using

stitching,  faux stitching, cross stitch or any stitch design.

Another idea:  circle or oval dies to represent embroidery hoops!


My stitching is actually real and I worked this magic by hand :)

I'm actually starting several 'slow stitch' projects

and really love the concept!


If you'd like the visual version to this, here is my YouTube video:


For these beauties, I call them journal candies -

similiar to the 'card candy' (embellishments) concept but for journals.

They are meant to be flat, layered with ribbons and lace and materials

and terrific focal points for journals or junk journals.

They are also wonderful focal points for cards and tags!


I sewed these by hand :)


Here they are up close:


Be sure to check out the CCEE Stampers blog!

Thanks for stopping by!

Kelly


2.15.2022

DD2: Library Lovers!

Hello friends!


It's time for another round of Dueling Darling cards!

Our hostesses this month were Carol (Team Kelly) 

and Tracie (Team Jeanette)

and their theme:  Library Lovers!


How exciting!

That's one place I frequent often and absolutely love!

Here is my card based on the kit Carol sent to us:


I wanted my card to be a collage-y style

like in a journal.

The image is from The Ton and I colored it with my copic markers

and added one of each element from the kit except the ribbon,

There was so much in this kit, I can make many cards!

Here are all the other cardmakers:

Barb

Carol

Darlene

Jeanette

Kelly (you're here!)

Lorraine - SCS Gallery

Terry

Tracie


Thank you Carol and Tracie!

Beautiful theme!


Thanks for stopping by!

~Kelly

2.10.2022

CCEE2205 ~ LOVE!


Hi friends!


It's time for another challenge at the CCEE Stampes ~ LOVE!

Liz is our hostess and her challenge this week:  


Hi, Liz here again with our next challenge for February. 

Valentine's Day is a big card sending holiday, one of my favorites. 

So the challenge for you is to make a special Valentine's Day card

 or a friendship card using one of your favorite layouts or techniques a

nd then mail it to someone you love. 


 Thank you, Liz!

My card is a favorite technique - weaving!


I used a heart shaped dienamic from MFT Stamps

and wove strips of scrap paper through it in a fun pattern -

some of the stripes teeny tiny skinny (like me! HA! NOT.)

and some in random widths.

I like it :)


I added an Anniversary sentiment strip from CZ Designs 

and it won't have that far to go

 since this card is for my daughter and son-in-law :)


Be sure to check out the CCEE Stampers to link up your cards!


Thanks for stopping by!
~Kelly

2.09.2022

3M: WOOD you be mine?


Hi friends!


This is my card for the 3 Musketeers card group  ~

 Barb, Jeanette and I.

This group was created by Jeanette and

I am delighted she invited me to join her and Barb on exchanging

stamped images with each other once a month to create a card.

We each have the same image ...

we each make a DIFFERENT card!


This month, Barb was the hostess and sent us this cute image

from Avery Elle called WOOD YOU.

Super cute play on words and oh. so. cheeky!


Here's the inside:


We'll be back next month on the 9th with 

another mystery image from our hostess Jeanette.

Be sure to check out Barb's card here

and Jeanette's card here!


Thanks for stopping by!

~Kelly

2.07.2022

Send a Card to a Friend Day!I


Hi friends!

Happy Monday!


AND ..

Happy National Send a Card to a Friend Day!


As papercrafters and cardmakers, THIS is a fun day to celebrate!


Today's card is a new to me technique ~ 

the split circle from today's TLC at Splitcoaststampers.

  I've actually seen this before but kinda skirted by it ... until now!

It's a fabulous geometric design and very easy to do!

I started with my Hero Arts infinity nesting circles and made 3 sizes.

And, used the Doodlebug paper pack again - this has been my go to paper!

Assembled and added a sentiment and boom ... there you go!

Here's the inside, left intentionally blank ...


This is heading all the way to the midwest today!

Guess I should go find my stamps ....

of the postage kind! :)


Thanks for stopping by!

Be blessed,

~Kelly 

2.03.2022

The ONE new in '22 ~ February!


Hello friends!


Today's card is for my One Plus Twelve card series

where if you've been following my blog,

you'll know this one is my FAVORITE ever!

This is my 4th year doing this series and you can start here  :)


I take ONE stamp (and only ONE)

and use it TWELVE times, each month on the 3rd.

The idea:  We pay a lot of our stamps, dies + supplies!

Often, they get used once and filed away, never to be seen again

so this way, you'll stretch the use of those stamp to the utmost!


This month's stamp is Pink Fresh Studio Butterflies

and just love how fresh and gorgeous it is!

For February, I decided to do some paper piecing and stamp onto the 

designer paper from Doodlebug Designs.

I wanted something this month to reflect the month of love <3


I added a sentiment to the inside of the card

from the same stamp set:


My 2 friends Jeanette and Barb have joined me again this year

in this series and you can see their cards on their blogs, too.


Thanks for stopping by today!

Be blessed,

Kelly


CCEE2204 ~ Winter Olympics!


 Hi friends!

I have a new card to share for the CCEE Stampers Design Team

and this week we are heading to the Winter Olympics!

Oh how I adore the winter sports!

Liz, our hostess for February, has selected this theme and writes:


 Hi, Liz is our hostess for February, and in February, the world's biggest winter sporting event 

that happens every 4 years, the Winter Olympics will be held in Beijing, China..

 So as our challenge, feature one of those winter sports on your card, 

and you might even want to add gold or silver as embellishment or highlight on your card.  


Such a fun theme, Liz!

I normally mostly watch the ice skating portions of the Olympics

but do love the alpine and cross country skiing as well as the luge!

So my card reflects the skiing with these two cute bears from MFT Stamps!


This is one of my oldies but goodies from MFT Stamps

where I'll be going in a few weeks!

We have a trip 'up north' planned and I am mapping out the days

the brick and mortar MFT store will be open - it's such a fun store!

This set is called Ski-Sons Greetings and in honor of this month of love,

this is the sentiment from the set that I chose to use :)

The background is the Cloud Edger Stencil on blue cardstock 

with 3 different Ranger Ink distress inks, blended with a TE Blender brush.

The images are colored with my copic markers

and if you peep the mountains - they are silver!


Be sure to check out the blog and what the Design Team created!

Thanks for stopping by,

~Kelly

1.31.2022

I used my good paper ..........


Hi friends!

Today's post is a super simple CAS card 

with a theme of:  hearts!


I used a background panel that I'd watercolored

and it sat in my 'use me eventually!' pile.

I took my Hero Arts infinity hearts dies and cut a heart shape

and intentionally cut it off center a little bit to have part of it straight.

I did that for the drama :)

Underneath is a glimmery gold paper from Recollections

and someone please PLEASE tell me how to photograph shimmery paper!

It's the worst!

I tried and tried and finally just said 'yup, looks good!"


The sentiment had me in stitches when I saw it -

the limited edition Brutus Monroe and Taylored Expressions stamp set.

It's filled with sweet, funny, cute and fabulous sentiments!

And I do love me some cheeky Valentines!


That's it for this post ~

thanks for stopping by!

Be blessed,

~Kelly

1.29.2022

Mermaid TALES - Inspiration!


Hi friends!


Today, I have a tale to tell of a tail ...

of a mermaid!

I know ...... huh?


I can finally share this card that I've been sitting on!

Although if you follow me on Instagram or YouTube,

 you've already seen it :)

Today, I'm hosting the Inspiration Challenge at Splitcoaststampers

and the site that I've chosen is Natural Life.


It's super groovy site!  Very bohemian and boho chic and 

- as my family likes to say about me -

 super hippie :)

They also have a Pinterest board here for more inspiration!


How does the Inspiration Challenge work?

Browse their store or Pinterest, find a photo that inspires you,

and create a card/project based on some part of the photo.

Maybe it's exact or just a color scheme or element from the photo!

Here is what inspired me - this purple jacket and the blue rolling waves.

Easy Peasy!

This is my 2nd year hostessing and am looking forward to 2022!


Thanks for stopping by today!

Be blessed,

Kelly

1.27.2022

Stamping Sisters Camp - Day 4!


 Hello friends!

It's Day #4 and the final day of the Stamping Sisters card camp :)

And today's camp counselor is Darlene <3


And WOW!

Did she ever save an AMAZING card tutorial/product for the end - 

talk about a big last camp HURRAH!


My post is a picture heavy one which shows how I made my

card and the elements of how it works from bulky to flat!

Darlene explains is beautifully in her blog post here

and I will show you my card ....

then, if you want to see all the photos, keep scrollin!


For my card based on her tutorial, I used the amazing gilding polish

that Darlene generously sent - THANK YOU, Darlene! 

She sent me a gorgeous vibrant green and yellow

and I was so excited to try these!


This is the first time I've ever used them so it was a bit of a learning curve,

but a good one.

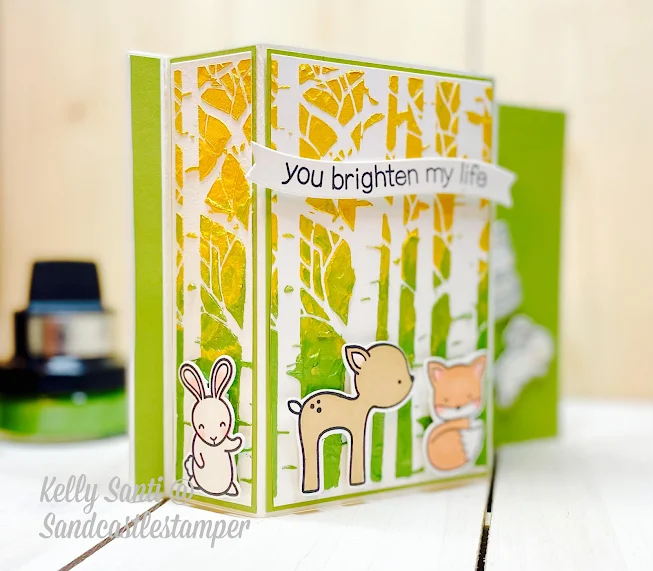
I used a woodland stencil from TCW and wasn't sure how to use the polish

and ended up layering it on SUPER thick!

I did use spatulas but in case ya didn't know - the lid is a brush! :)~


It gave me some awesome texture though!

I'm not mad at it!

And I decided to add yellow for the golden hour sun peeking through

the woodland trees and in the middle, blending the two colors.

They kept saying it dries quick but 2 hours later, 

mine was still thinking about it, LOL!


Next up, I got to working on the card fold.

Per her directions, it's a 5 x 7 and is/like a bridge fold (I think?!)

but folds flat for mailing.

I had to wiggle mine just a wee bit as I realized my stencil was 4 x 4!

But I loved the result of the "woods" ....

the green with the burst of the golden sun peeking through the trees <3

Behold!


                 I used a few different Lawn Fawn sets to complete the look

and knew I wanted to add woodland critters.

I am over the moon with how this turned out

(even with a scandelous amount of hours to make it! gasp!)

This was an amazing card adventure -

one I would not have gone on had it not been for Darlene's amazing gift

AND her amazing card challenge tutorial.


Here's what it looks like flattened for mailing ....

('member Flat Stanley?  We'd squish him and mail him?!!)


I think the last tip

 - or how I made this one -

is the left side (by the waving bunny) is glued down with score tape.


The other side remains open so the recipient can read the card

and it tucks into place underneath the critter by the jumping bunny.


This was such a fun week ~ bringing camp 'home' since we can't 

get together again at this time.

Maybe one day soon!

Here is the line up of our week that we've posted each day,

the counselor of the day and the class we all taught.

It was certainly massive fun and

I'm already thinking up ideas for summer camp!


Monday/January 24th  ~ Jeanette @ Creativeplay 
Tuesday/January 25th ~ Kelly @ Sandcastlestamper
Wednesday/January 26th ~ Barb  @ inkingintoretirement
Thursday/January 27th ~ Darlene @ Accordingtobijou

Thanks for stopping by!

Be blessed!

~Kelly

1.26.2022

Stamping Sisters Camp - Day 3!


Hi friends! 

It's Day 3  of the Stamping Sisters winter card camp

and our camp counselor today is:  Barb!


Her challenge for us today was to create a card using the 

faux tile backsplash technique and O.M.G!

This was fun!


If you'd like to go back and see all the camp cards,

here's the line up of cards and techniques!


Monday/January 24th  ~ Jeanette @ Creativeplay 
Tuesday/January 25th ~ Kelly @ Sandcastlestamper
Wednesday/January 26th ~ Barb  @ inkingintoretirement
Thursday/January 27th ~ Darlene @ Accordingtobijou


On to my card!

Here's my card and then keep scrollin' if you'd like to see 

the how/where/when/what and why :)


For my card here, I started with red and pink cardstock

cut with my new Ellen Hudson Color Me Strips die -

which I've had and has been forever in it's package!


Thanks for the nudge to use it, Barb!


From there, I did the technique following Barb's instructions

and wove both the pink and red strips of cardstock from MFT stamps.


But even with double adhesive AND taping the back, my weave moved.

Once it was woven into place, 

 I clear embossed the front weaved panel

to give it the 'shiny' look - just like a real tile backsplash!

Brilliant!


Since my woven panel moved while my eyeballs were elsewhere,

 I thunk and thunk some more.

I said to myself ...

 "Self!  Cover it up!"

"No. one. is. gonna. know."

 :) 

 So, I popped up the panel on the front

with a heart from Hero Arts nesting hearts dies.

The stamp set I used is MFT Stamps Grande Sized Love

and I colored her with my new gifted from Santa copic markers!


 Here's a final look:


And that's it for Day 3 of camp!

I hope Barb and the other campers like my card ~

if not, I brought some  s'mores!

Surely chocolate and a campfire will make up for it ...
and I'm sure I have a few skits and jokes I can tell!


Thanks for stopping by!

Be blessed!

~Kelly